Around six months ago, Google began marketing a bundle of fascinating APIs with the launch of their Cloud Platform. Using a simple REST interface, one could translate between any two languages on the planet (Translation API), determine the content of an image (Vision API), extract meaning from natural language (Cloud Natural Language API), and much more. I had a dream of running the image posted by WHOZ CHILLIN through the Vision API to let me know whether the tennis courts were free and I could run over and play. While it turns out, that is drastically out of the scope of the service, it was a nice idea at the time.
Anyway, the only problem was that I had no idea how to use a REST API. I knew that one somehow sent a request to a web service and somehow received a response and that the whole process was supposed to be easy, but I had no idea as to how it was actually implemented. All of the engineers with whom I worked ensured me that the WHOZ CHILLIN to Vision API project would be trivial, so I was too embarrassed to ask for help.
As I rolled up my sleeves and went to work, I learned that the all communication on the internet happens over HTTP and it is possible to make four kinds of requests: GET, POST, PUT, and DELETE.
GET is what happens when you visit a website with a browser. Your browser gets something (most simply, a static webpage) from some server and displays it on your screen, You can see how this works with Wikipedia’s REST API by pasting
https://en.wikipedia.org/w/api.php?action=query&titles=McKinnon&prop=revisions&rvprop=content&format=jsonfm
into your browser. Here, your browser is submitting a GET request to Wikipedia’s API found at https://en.wikipedia.org/w/api.php and Wikipedia is returning a JSON list of all of the articles that contain McKinnon in the title. You just as easily could make this request through your own HTTP client or at the command line, as we will learn shortly.
POST, PUT, and DELETE request all involve sending in addition to receiving information. When you fill out a web form, you are typically POSTing, when you need to override an existing attribute, you are typically PUTting, and DELETing is self-evidence. There are several other REST calls as well, but I have never seen them in practice.
Before building an HTTP client, it is helpful to get a better understanding of how these calls actually work using both the command line and a program called Postman. The command line contains a tool called curl that lets you make HTTP requests right from the terminal window. Try entering
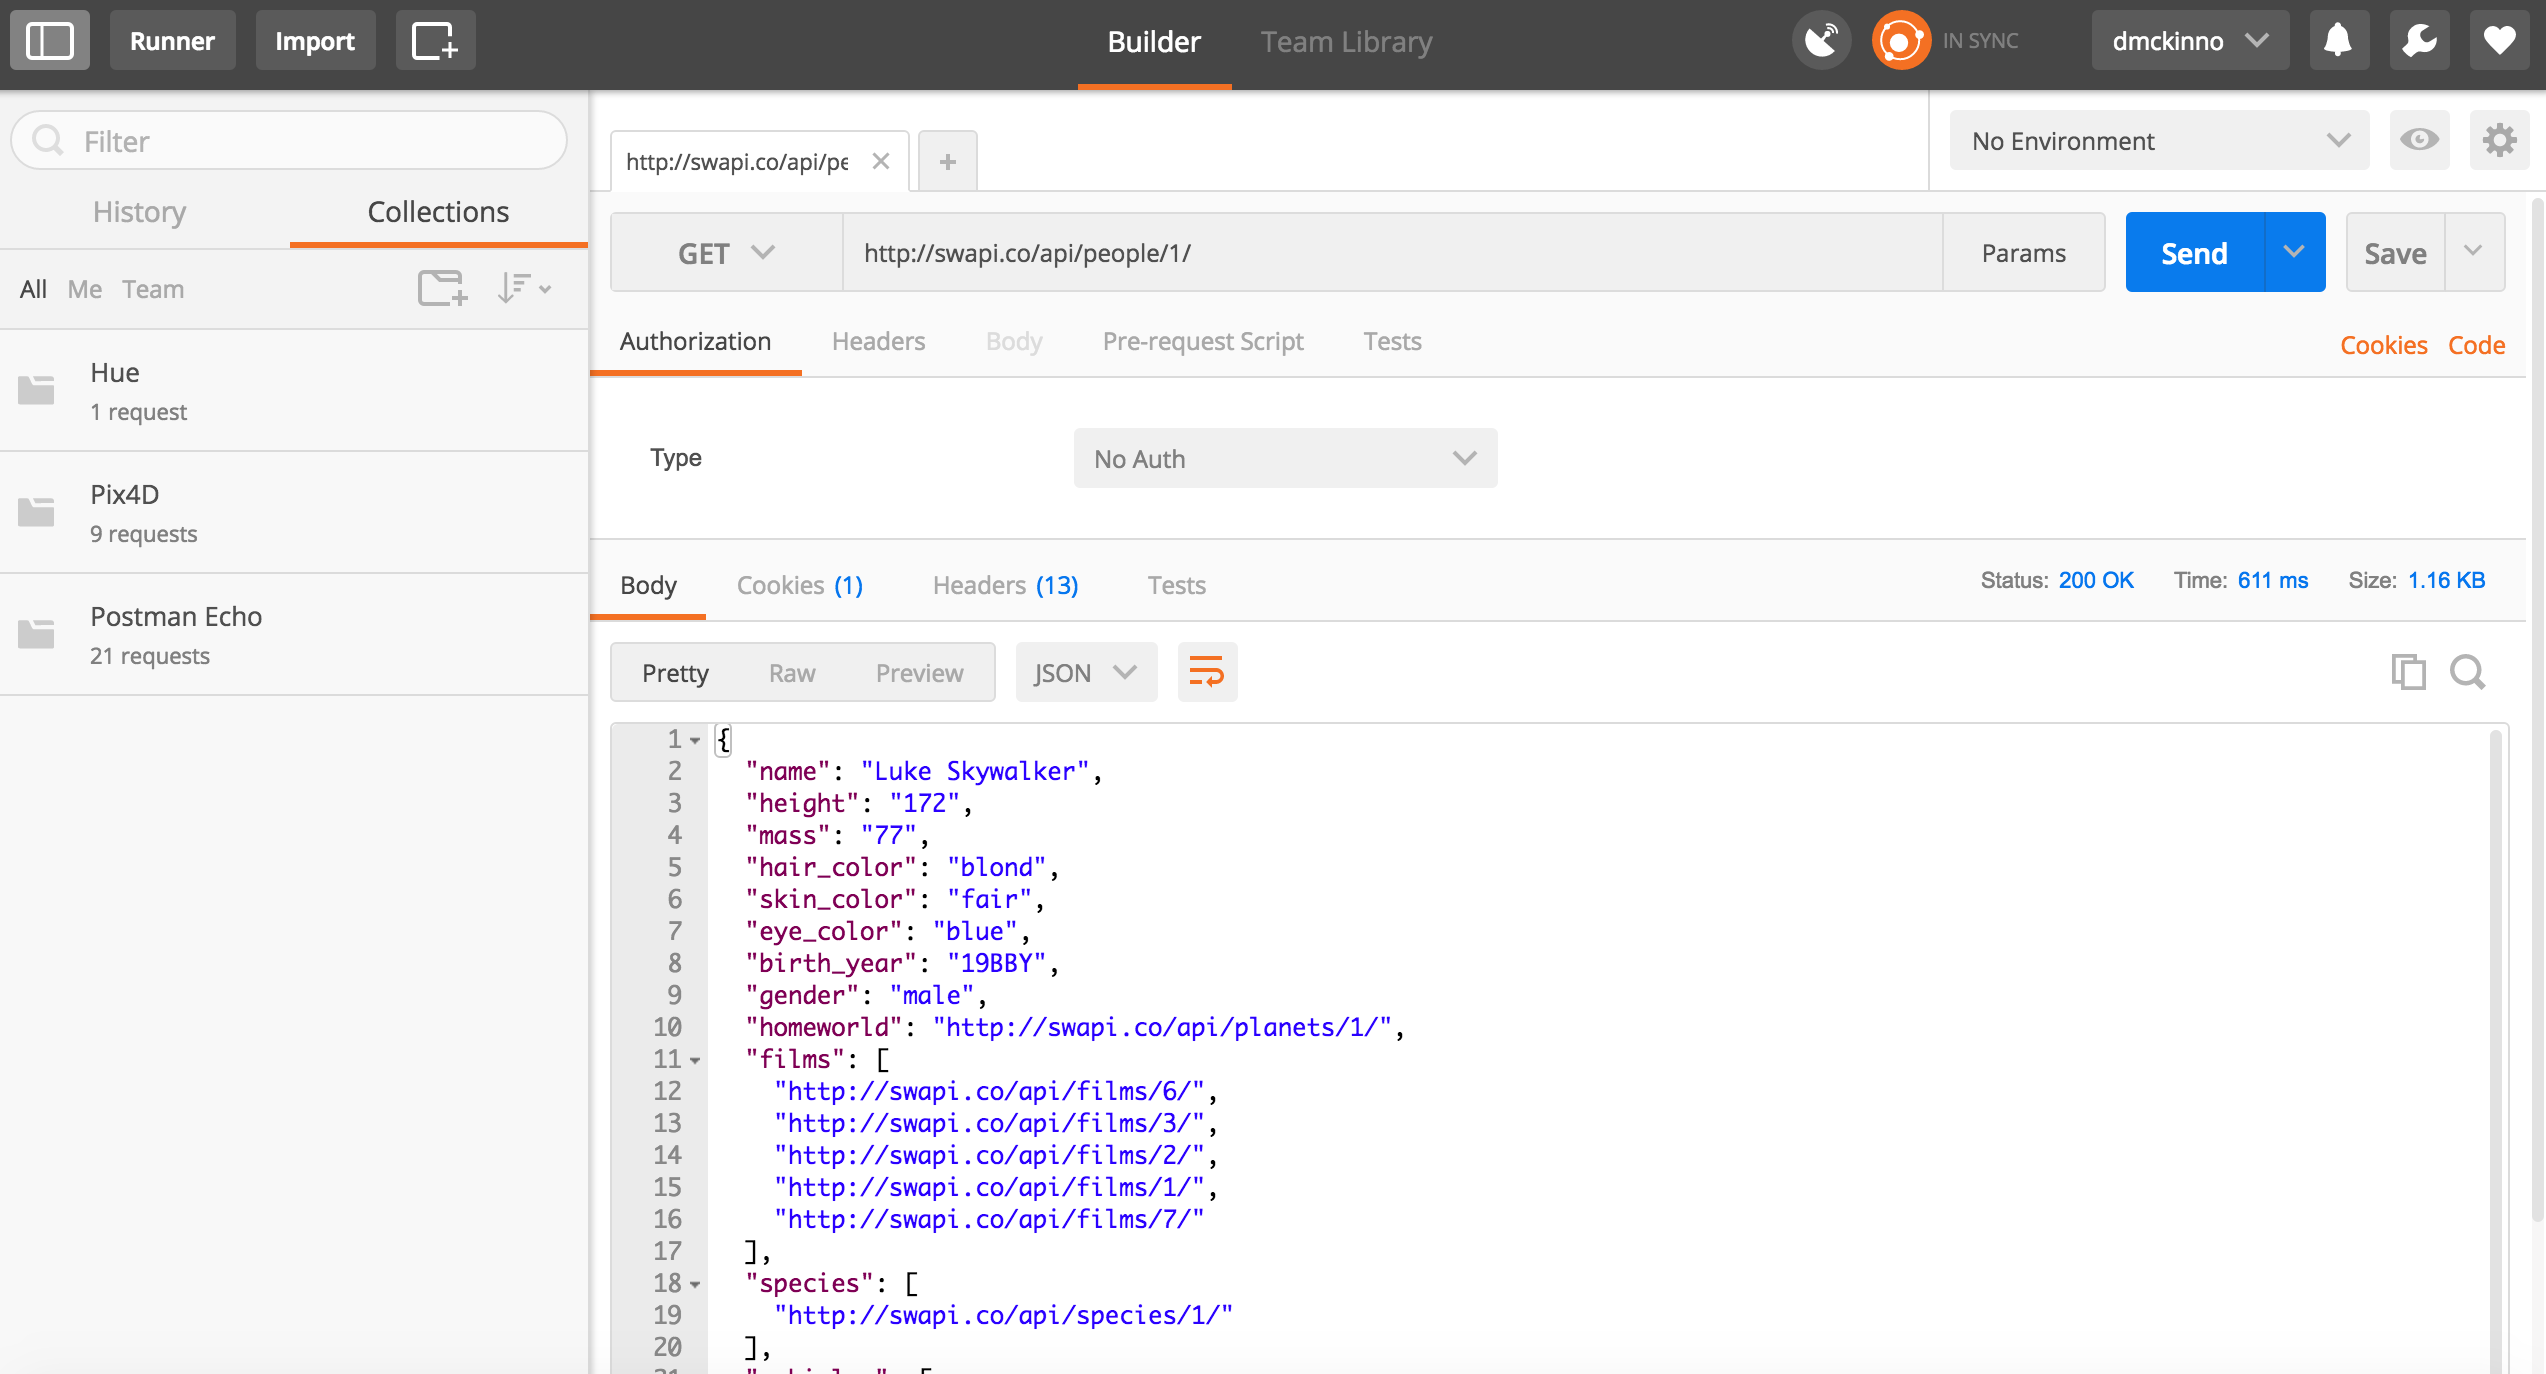
curl –request GET http://swapi.co/api/people/1/
into the terminal. The API will return a a JSON string full of information about Luke Skywalker. Changing the 1 to a 2 will help you learn about C-3PO. Swapi.co has actually build an extensive open (no authentication, which is usually the hardest part in real development) REST API allowing you to query facts about the Star Wars universe while learning about HTTP requests.
However, curl requests can get very tedious to keep track of. Postman is a free program that lets you save and repeat HTTP requests, which is enormously helpful in debugging as interactions between machines get more and more complicated. This same Luke Skywalker request through Postman is shown below.
With a simple GET request, the difference between curl and Postman is negligible, but once you start passing headers and tokens and data around, testing using curl becomes unmanageable.
Now that you know how to use the basic tools, it’s time to write our first client. HTTP clients can be written in any language: Swift, JavaScript, Visual Basic, Python, Java, etc. For the web, which is where most of the requests machinery lives, Python, with its beautiful library, Requests: HTTP for Humans, is easiest and will be used for these demos.
To start off, it’s helpful to chose a project. Think of some IoT-like device that you would like to control from the internet. For this first example, I will use my Philips Hue lightbulbs, whose REST API is very well documented at https://www.developers.meethue.com/.
Next, begin prototyping your code with Postman. It is pointless to begin writing your code unless you know exactly what requests you will be making, so I would recommend writing down the entire flow on paper. For my Hue app, I knew I needed to POST {“devicetype”:”APP_NAME#USERNAME”} to http://10.0.0.5/api to create a user and PUT {“on”:”true”, “sat”:saturation, “bri”:brightness,”hue”:color} to http://10.0.0.5/api/USERNAME/lights/LIGHT_NUMBER/state to turn on a light and change its colors. This is very simple from requests perspective, but I still made sure to test all of this in Postman and make sure that I could indeed change the state of the lights from my computer.
After sketching out the flow, open up a text file with your favorite text editor, download my sample code from Github, and create your own project so your fans and admirers can collaborate. Because, we will be leveraging the Requests library, the first line should read
import requests
Once the library has been imported you can use
requests.get, requests.put, requests.post, and requests.delete
The format is requests.TYPE(API_ENDPOINT, json = {whatever you want to send}). Sometimes it takes some experimentation to determine whether the json above should be a header or a data, but there are not too many options. For example, to turn bulb i to a dim, blue hue, use the line below.
requests.put(‘http://’+IP+’/api/’+username+’/lights/’+str(i)+’/state’, json = {“on”:”true”, “sat”:255, “bri”:10,”hue”:46920})
You can see in the sample code that I loop through two lights in my room and keep the IP and the username at the top, so I only need to change them in one place if need arises.
Because I don’t include any error handling in this code, go ahead and run it on your machine. I give the user an option to turn the lights in my room to dim blue, the lights in the kitchen and the living room to mellow candle, and randomly oscillate the lights throughout the entire house. You can see it is quite straightforward. Discotequa Kitchen is on display below.
Now let’s try a more complicated HTTP client. For this one, we will be using Pix4D’s cloud processing API to turn photos into a 3D model like the one below. This API is not public, like the Hue API, but does represent a fairly typical web service.
First, take a look at my sample code on Github. You’ll notice this is much more complex than the Hue app. In addition to requests, I am importing boto, an Amazon S3 uploading library, os, a library for crawling the local file structure, and simplejson, a library to improve the display of JSON. I also have a ClientID, ClientSecret, and password. On a side note, it is very important not to upload these to Github because scrapers run all over the internet looking for these keywords. Scanning through the code, you’ll notice I defined a few functions, have the ability to both process and check jobs, and make an awful lot of HTTP requests.
However, this more complex client is exactly like the Hue example above and can be built in the exact same way. Initially, I sketched out all of the HTTP requests I needed to make. Following along in the code, you can see that I request a token (GET), save the response, create a mission using those credentials (POST), save the returned URL, post the pictures to the mission (POST), and initiate processing (GET). While there are a few tricky intermediate steps like uploading the images to S3 and walking through the local file structure to generate a list of images, the requests piece is actually very straightforward.
I hope that after all of this you feel comfortable building your own HTTP client. If someday you ever accomplish my original vision (ha) by linking WHOZ CHILLIN and the Vision API, enabling you to analyze a drone video stream in realtime, be sure and let me know!